Setup e-Invoice in 3Warranty
This section explains how to connect your 3Warranty system to MyInvois using the credentials you registered earlier. Once this setup is completed, your system will be ready for testing and later live submission.
01. Enable e-Invoice Module
First, go to the Profile page inside your admin panel.
Under the profile settings, you will find e-Invoice Settings. Turn ON the toggle named Enable e-Invoice Module.
This will activate all e-Invoice related functions inside the system.
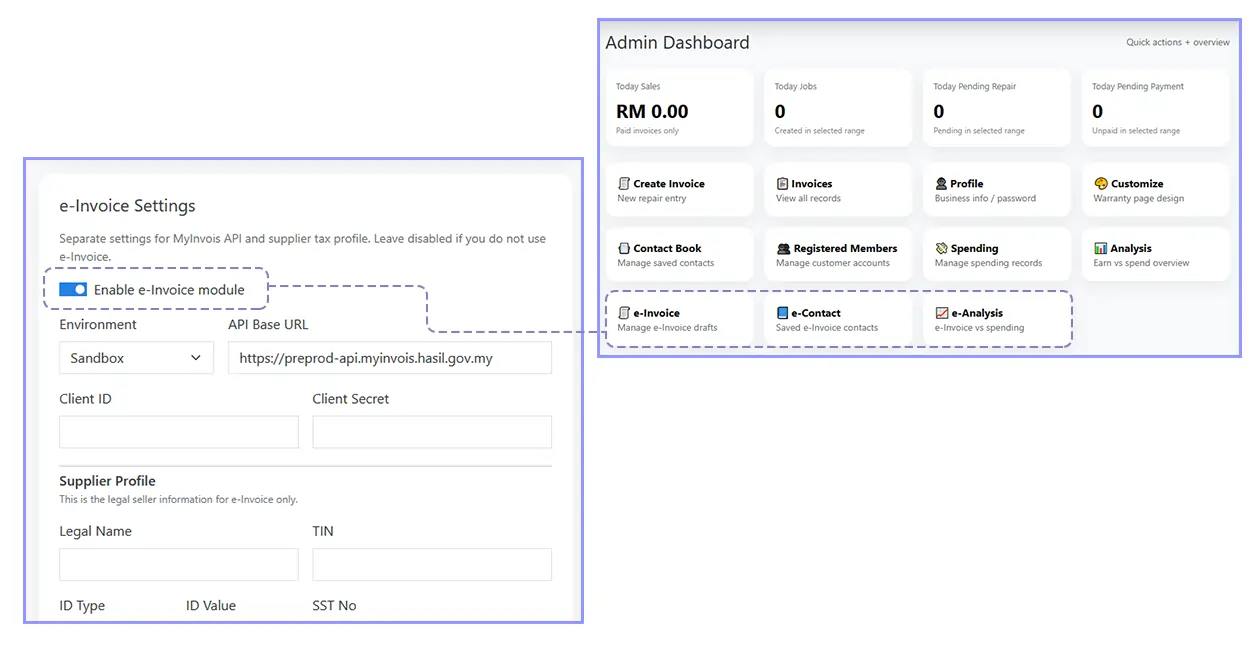
After enabling, your dashboard will show 3 new sections:
- e-Invoice
- e-Contact
- e-Analysis
These sections will be explained later in the submission guide.
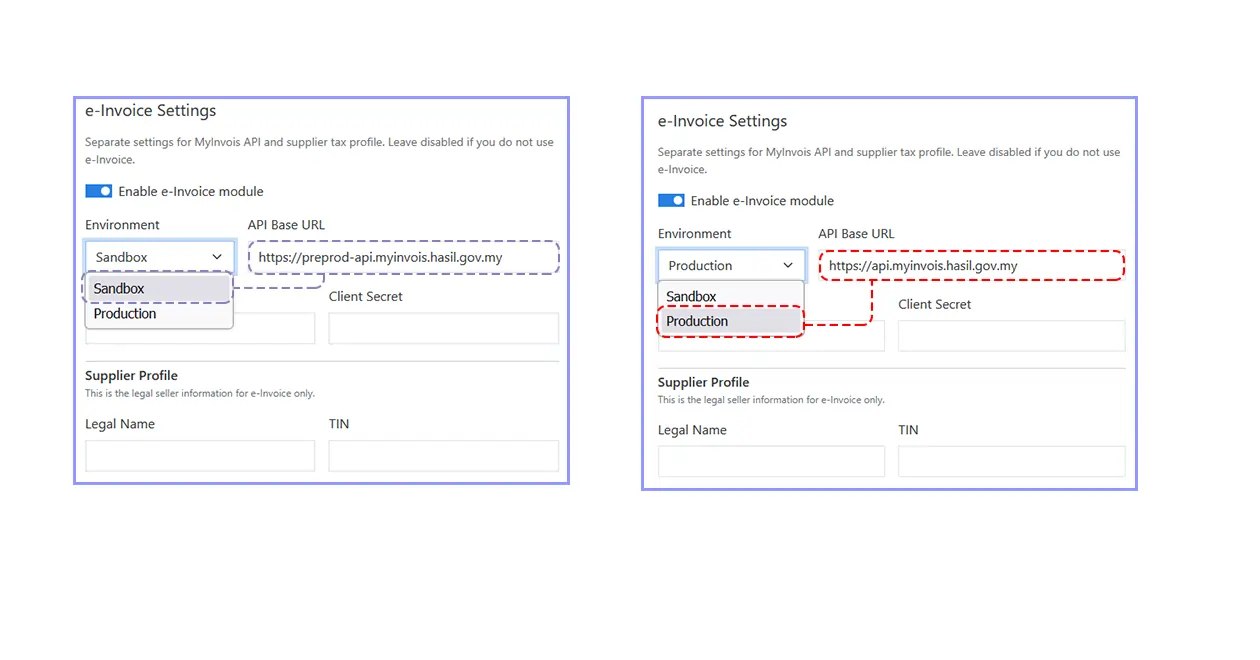
02. Choose Environment
The next step is to choose the correct environment.
For testing, please choose Sandbox. This is very important because sandbox is safe for learning and will not submit real invoice data to LHDN.
Please make sure you stay in Sandbox until you fully understand what you are doing. Production should only be used when you are ready to submit real e-Invoice to LHDN.
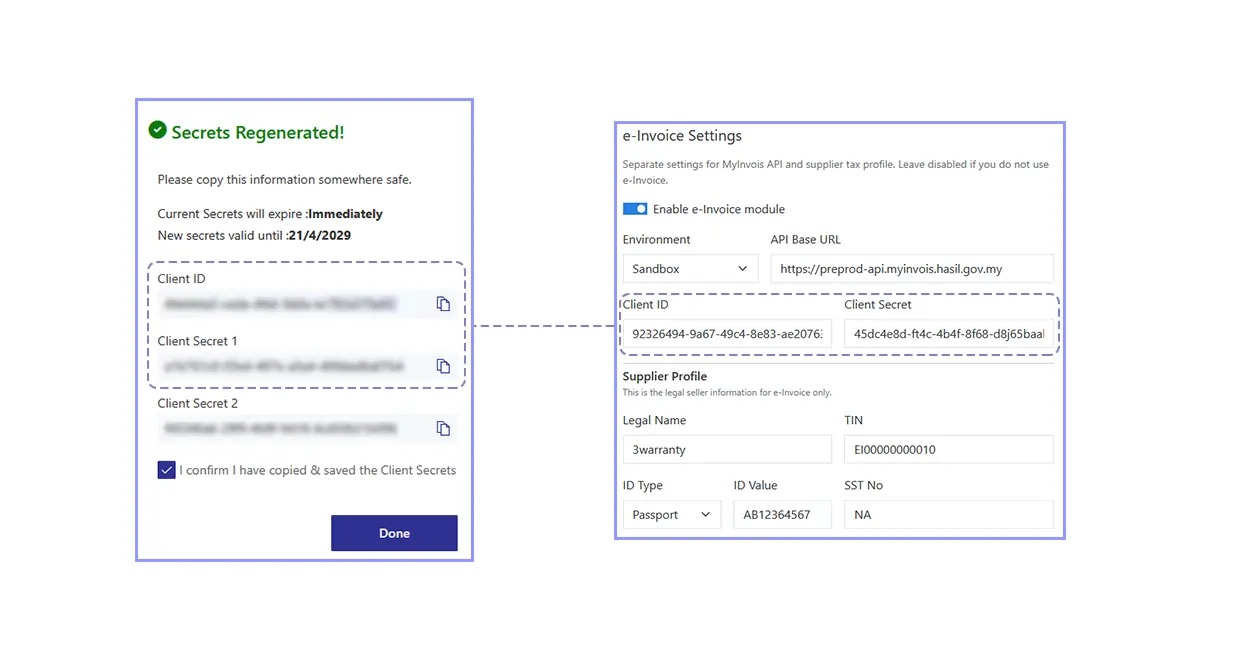
03. Insert Client ID & Client Secret
Enter the Client ID and Client Secret 1 that you obtained from MyInvois during registration.
If you have not registered yet, go back to the previous documentation page and complete the ERP registration first.
04. Fill Business Information
After entering the credentials, continue by filling in the rest of your business details.
- Business name
- TIN
- ID type
- Business registration number or NRIC
- SST
For the ID type, most businesses will use BRN (Business Registration Number). If applicable, you may also use NRIC.
If you do not have SST, simply enter NA.
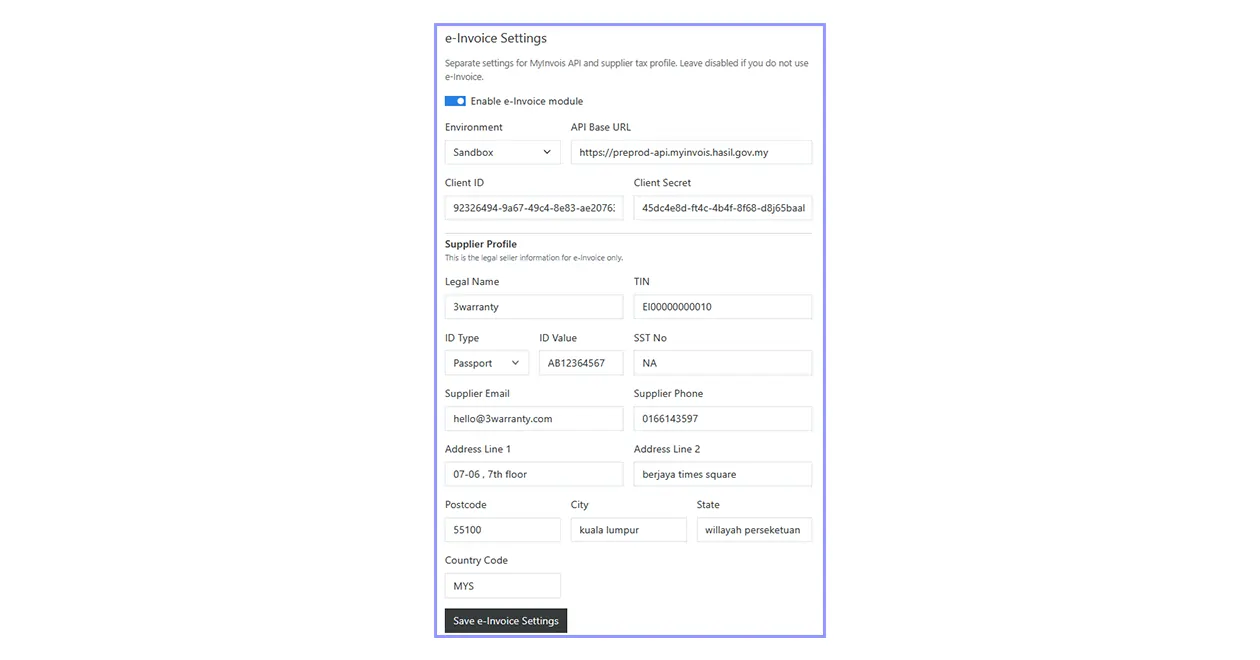
Finally, click Save e-Invoice Settings.
Your 3Warranty system is now connected to MyInvois and ready for testing.