Create & Submit e-Invoice
This section explains how to create a draft, fill customer information, submit the e-Invoice to LHDN, and verify that the document has been accepted successfully.
01. Open e-Invoice Editor
Go to your dashboard and open the Invoices page as usual.
Under the invoice action buttons, you will now see an e-Invoice button. Choose the invoice that you want to submit to the MyInvois portal and click that button.
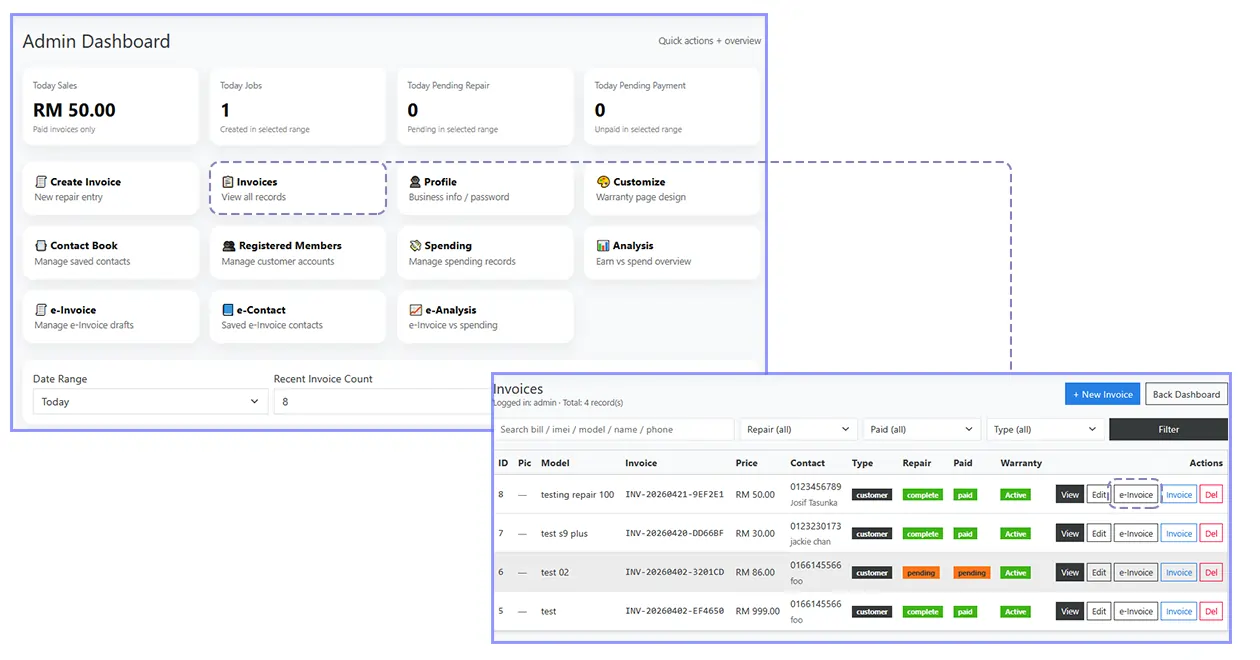
After clicking, you will be redirected to the e-Invoice editor page.
02. Fill Customer Information
In the e-Invoice editor, the document will first be treated as a draft. Here you need to fill in the customer or company information correctly.
Normally you will need to enter:
- Customer or company name
- TIN
- Registration number
- SST (if not available, just use NA)
- Other related information required by the form
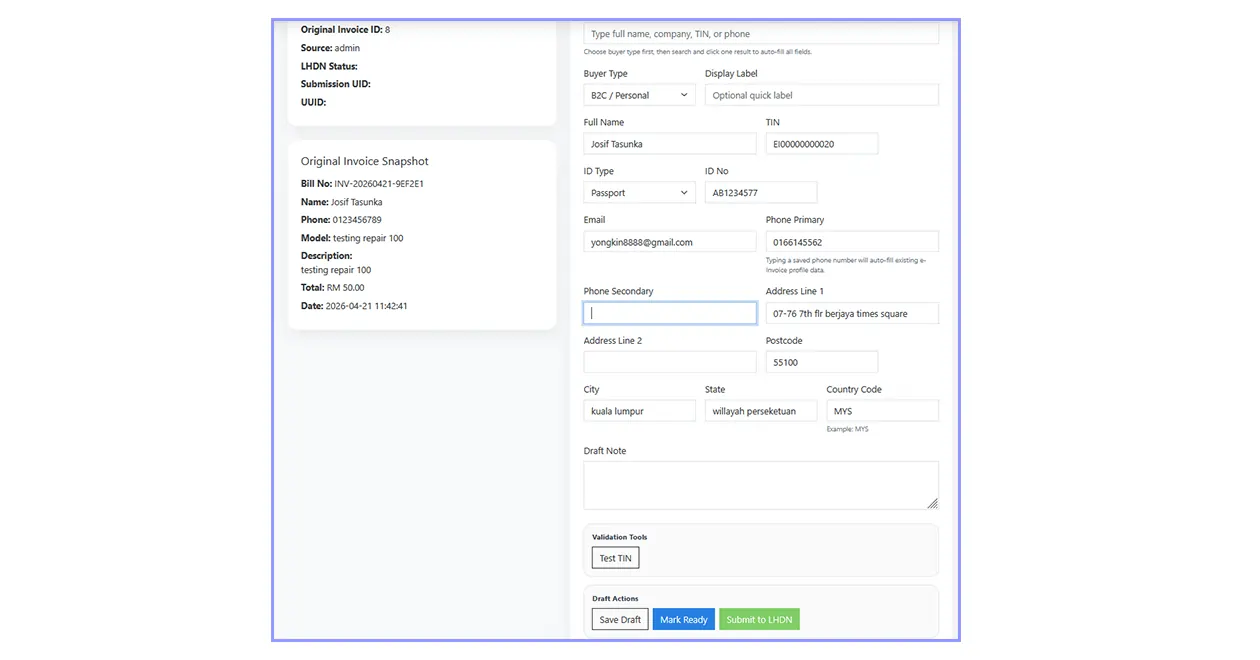
After everything is filled, you can click Save Draft.
This is useful when you are not ready to submit immediately or when you have many e-Invoices to prepare first.
You may also click Mark Ready. At this stage, the e-Invoice is still not submitted yet. It only becomes a real submission when you press the Submit button.
03. Submit to LHDN
Once you are confident that all customer information is correct, click the Submit button and confirm the submission.
If all information is valid, you should see a green success message at the top area.
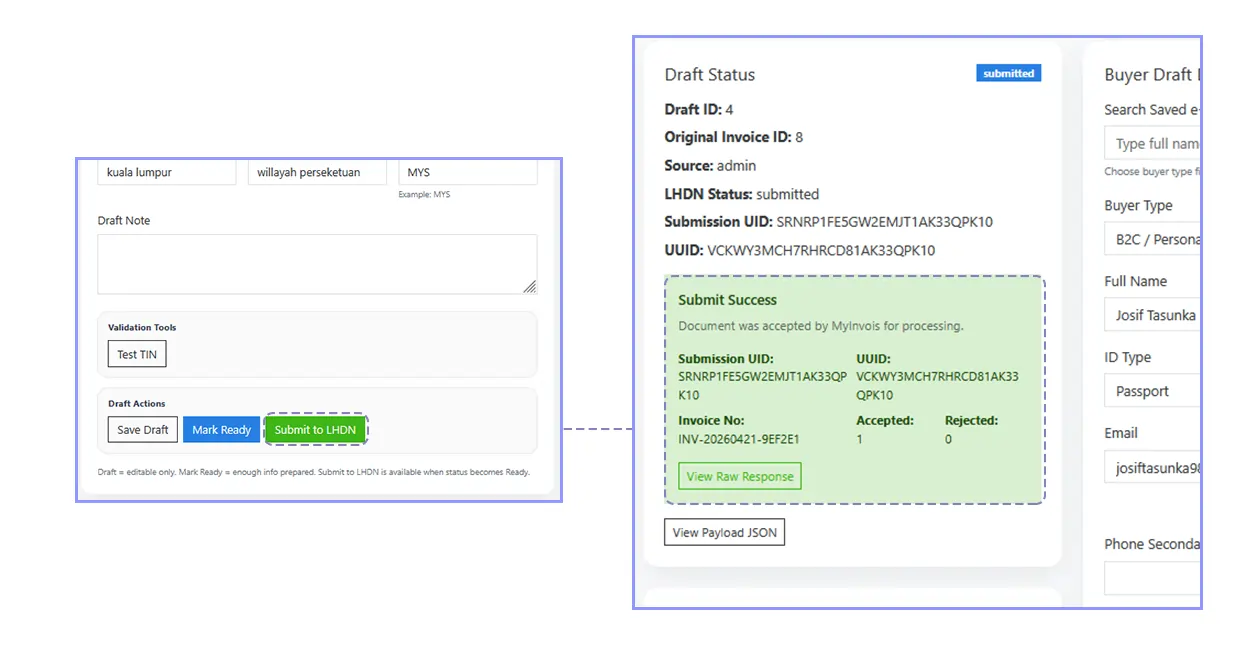
Once the green success message appears, your e-Invoice has been submitted successfully.
04. Check Submission Status
Go back to the e-Invoice list or CRUD page and look at the status columns.
Immediately after submission, you should normally see:
- Status = Submitted
- LHDN = Submitted
Refresh the page after a short while. If everything is accepted, the LHDN status should later change to Valid.
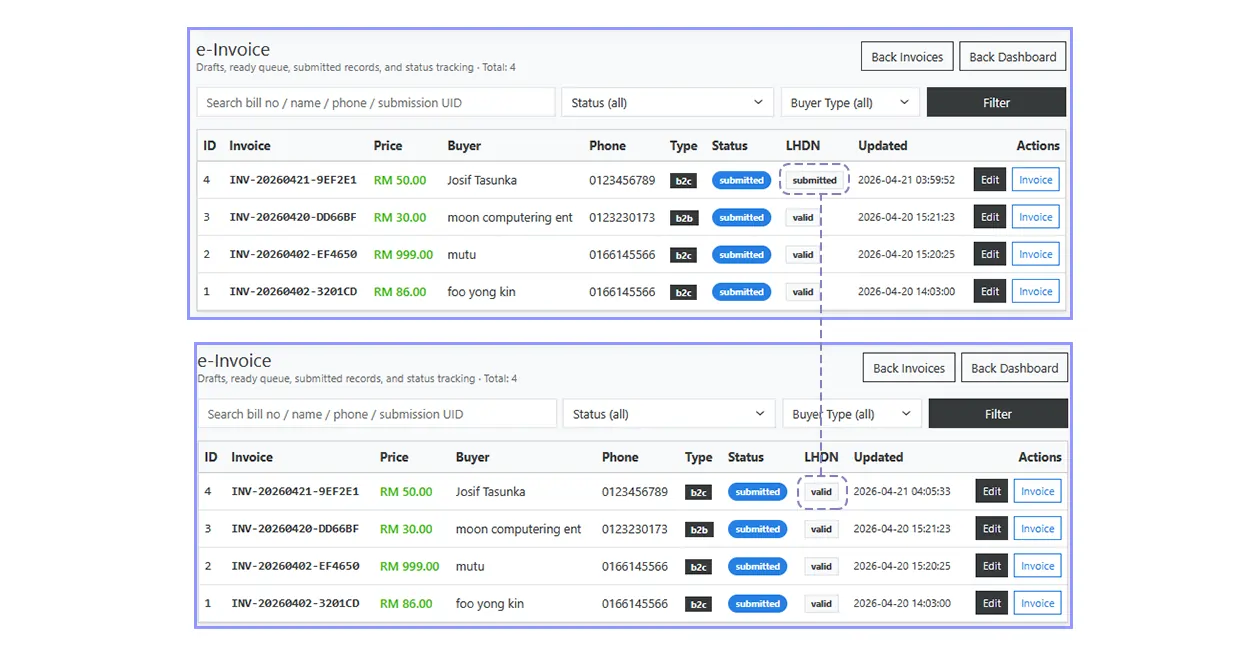
When the LHDN status becomes Valid, it means the document has been processed successfully without issue.
05. Verify with QR Code
Open the invoice and click on the invoice view.
At the bottom right section, you should see the e-Invoice QR. This QR code links directly to the LHDN website and acts as proof that the e-Invoice is valid.

Try using a mobile phone to scan the QR code. You should be able to view the e-Invoice information issued by LHDN.
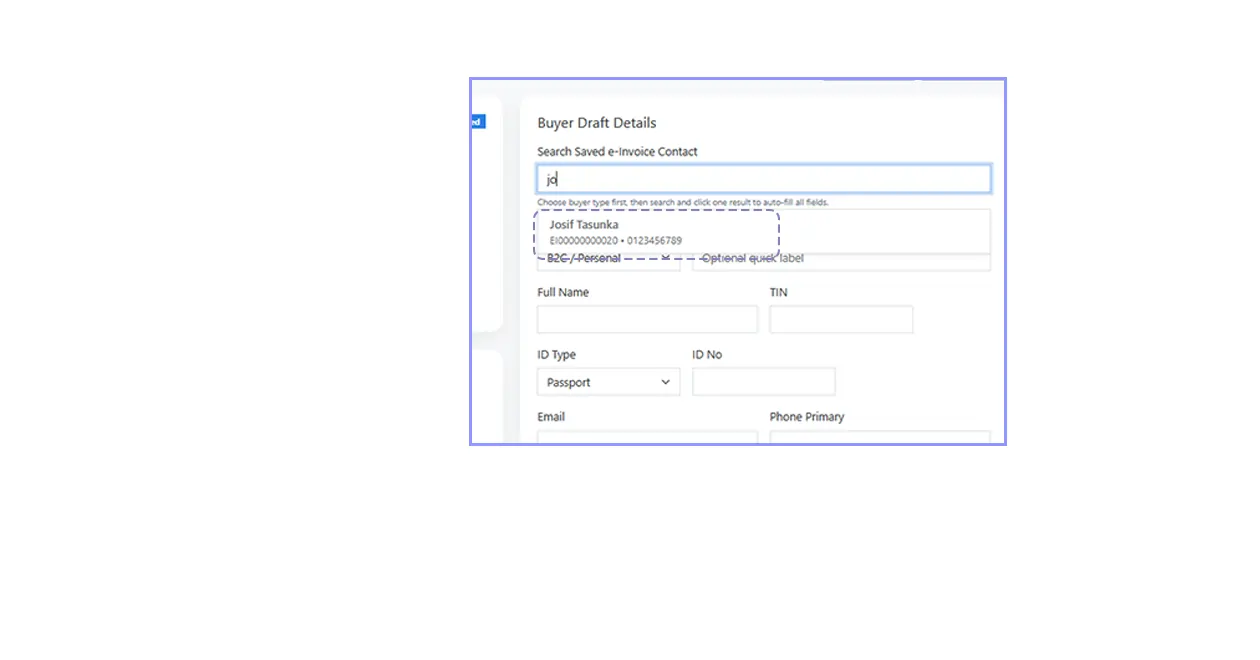
06. Smart Auto-Fill for Future Customers
The system is designed to make future e-Invoice creation easier.
This means once you have already filled a customer or company once, you do not need to repeat everything again next time.
When creating another e-Invoice for the same person or company, simply type a few letters of the company name or the first few digits of the TIN. The matching customer record will appear and you can click it to auto-fill the form.
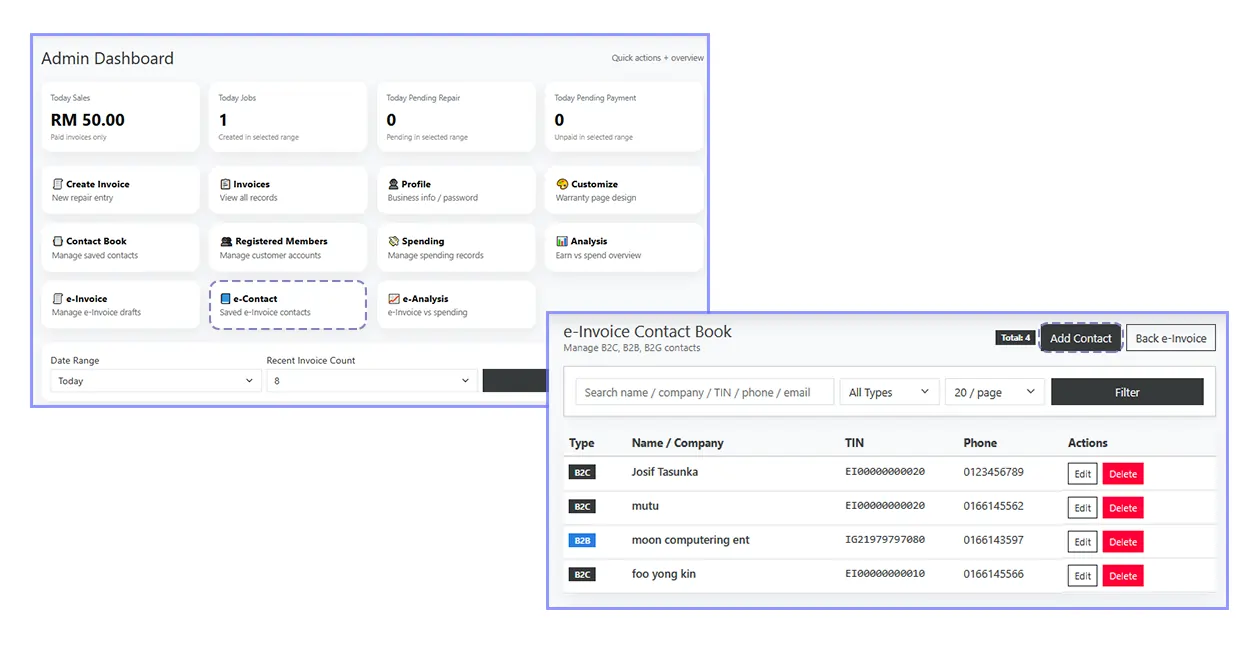
07. Add e-Contact Manually
You can also add customer data manually.
Go to: Dashboard → e-Contact
Then choose Add Contact at the top area. This is useful when you want to prepare customer information earlier before issuing future e-Invoices.
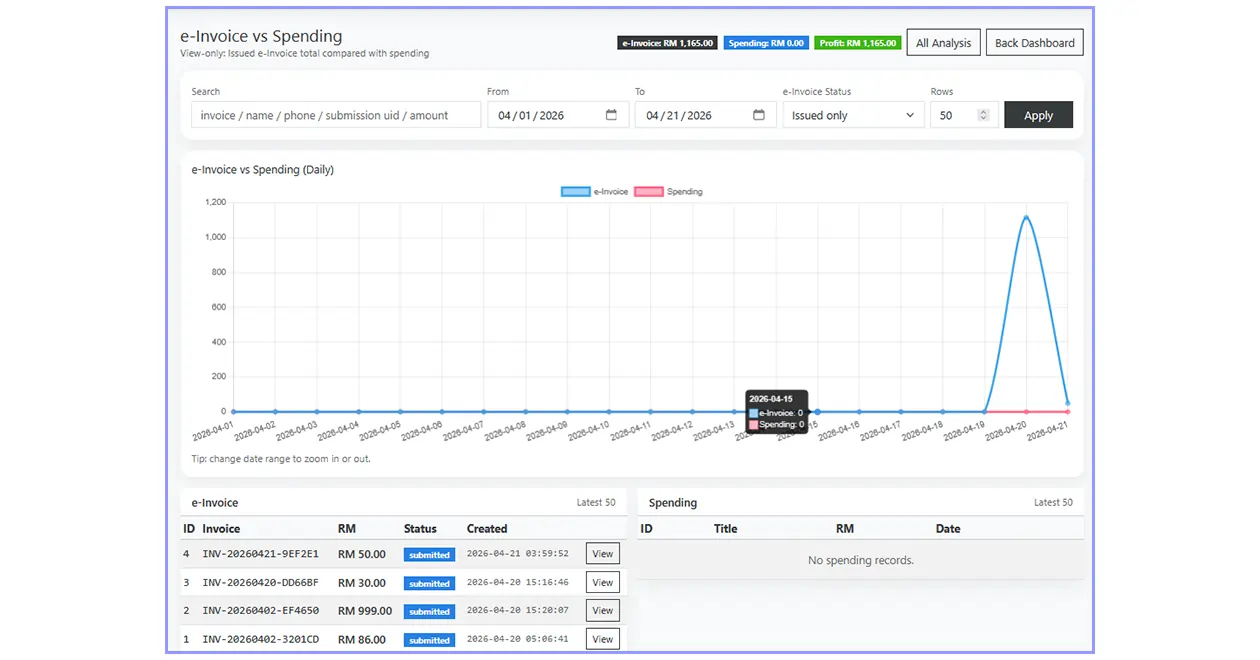
08. e-Analysis
You can also check monthly e-Invoice statistics through e-Analysis.
Here you can see:
- How many e-Invoices were submitted this month
- How many became valid
- Monthly trend and summary
- Comparison with total spending chart
This helps you monitor submission activity and gives a clearer overview of your document flow.