Invoice Creation & Data Lookup
This section shows how to create a repair invoice, set warranty information, upload repair files, and manage repair records in one connected workflow.
01. Invoice Creation & Data Lookup
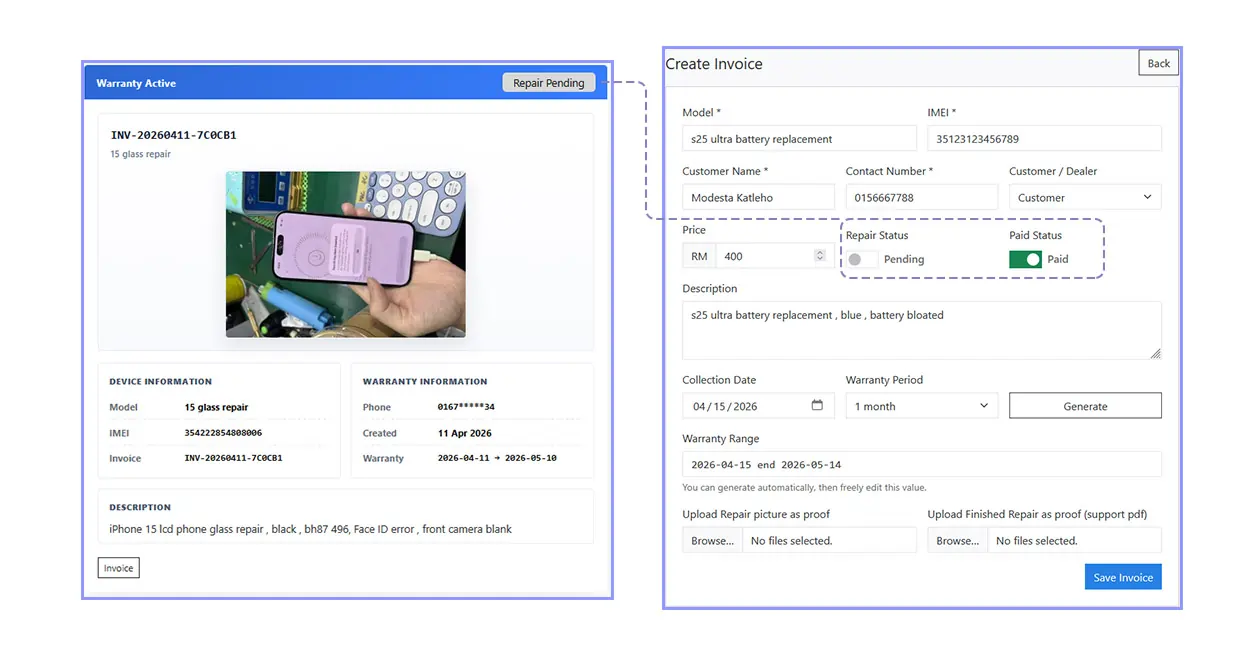
This page is the core workflow of 3Warranty. It helps you create repair invoices, connect customer records, and set the correct repair and warranty status.
02. Create a New Invoice
Under Create Invoice, this is the main step you need to complete.
Once the invoice is created, the system will automatically link related records, including customer search, warranty period, repair status, and customer contact details.
Customer names and phone numbers will be saved automatically into the contact book, making future invoice creation faster and easier.
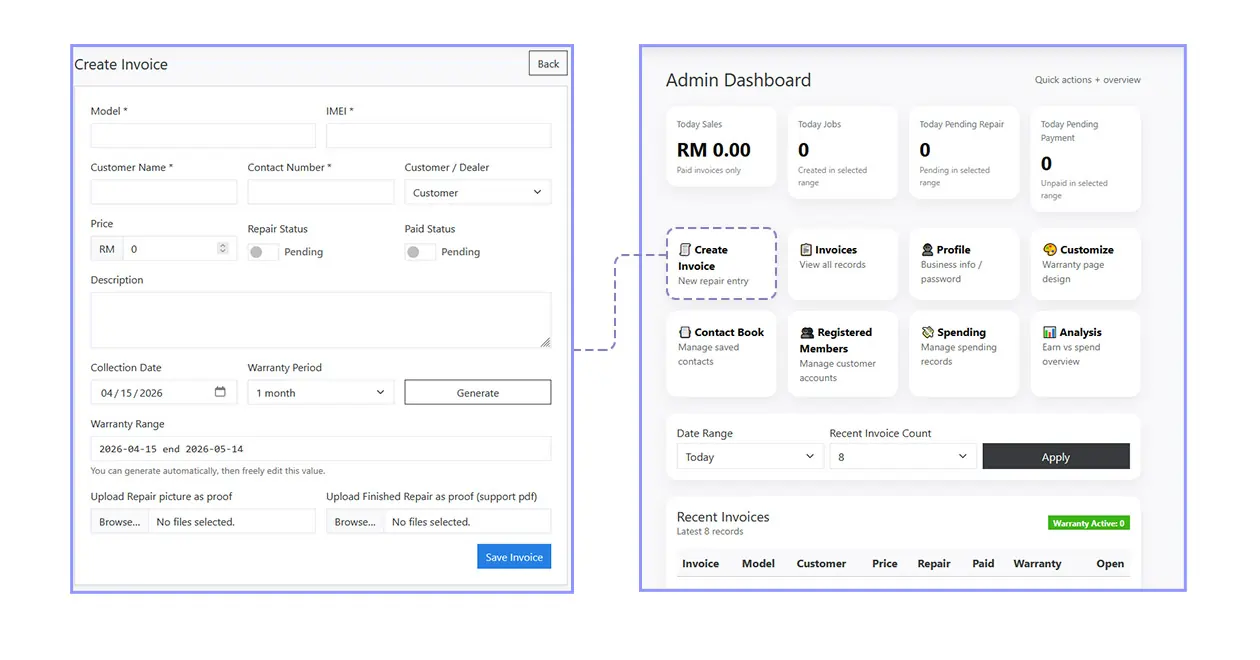
The required fields include:
- Model
- IMEI
- Customer name
- Contact number
You can also choose Customer or Dealer to separate records based on different pricing structures. If you do not serve dealers, simply use Customer all the time.
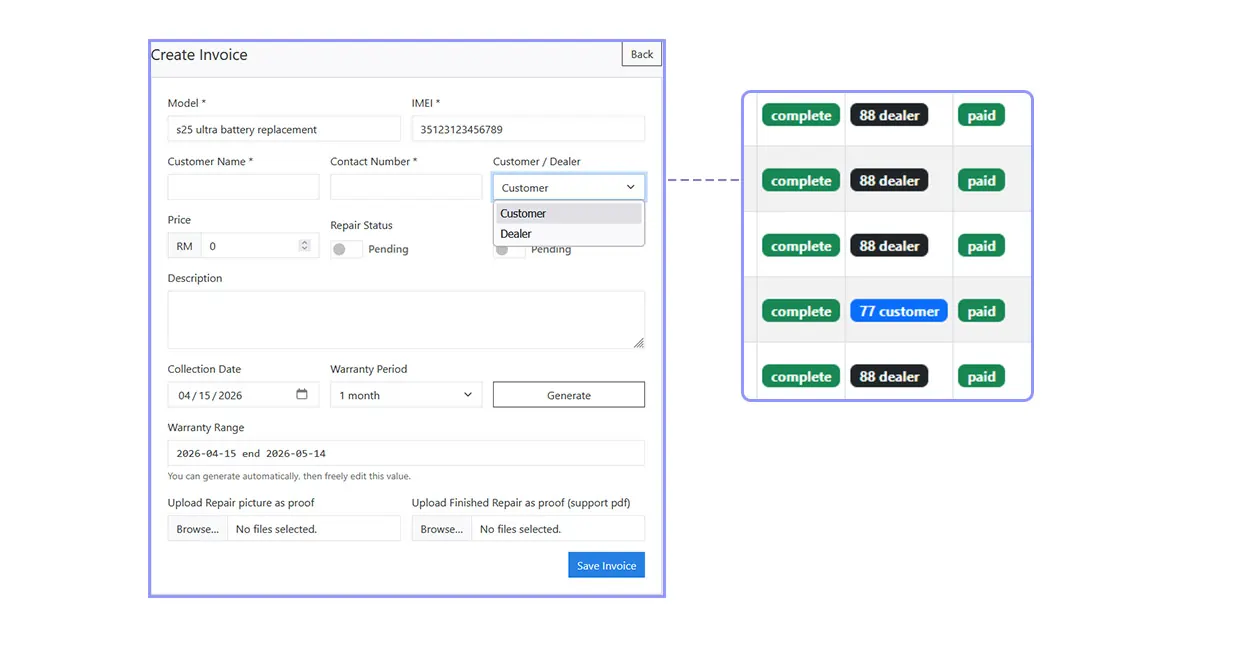
03. Repair Status & Paid Status
The Repair Status and Paid Status are turned off by default.
Keep them off while the repair is still in progress. Once the repair is completed, turn them on and save the invoice.
This allows the customer to see whether the repair is still Pending or already Complete.
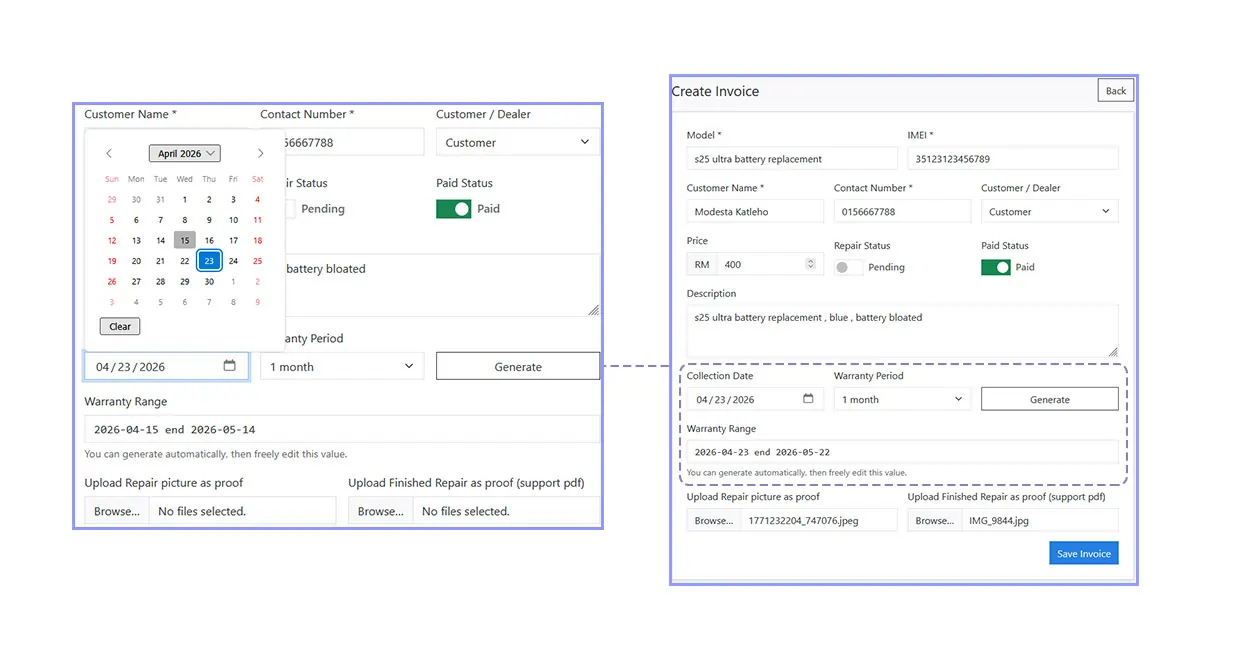
04. Collection Date & Warranty Generation
The Collection Date can be adjusted if the customer does not collect the device on the same day.
You can update the collection date when the customer collects the device, then generate the warranty starting from that date.
This helps make the warranty period more accurate.
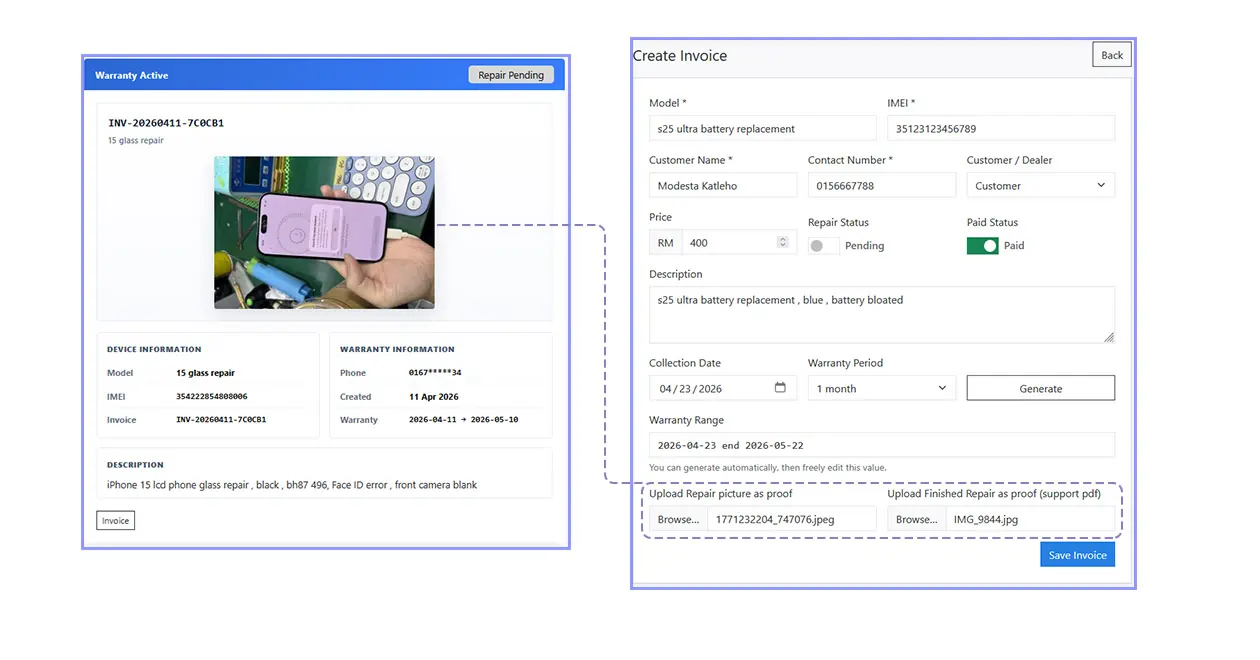
05. Upload Before & After Repair Files
The upload section supports two main file areas:
- The first upload box is for before repair photos (photo upload only)
- The second upload box is for completed repair files (photo upload or combined photo/PDF documents)
These uploads help keep clear repair proof and reduce future disputes.
06. After Saving the Invoice
After saving, you will see 3 action buttons at the top.
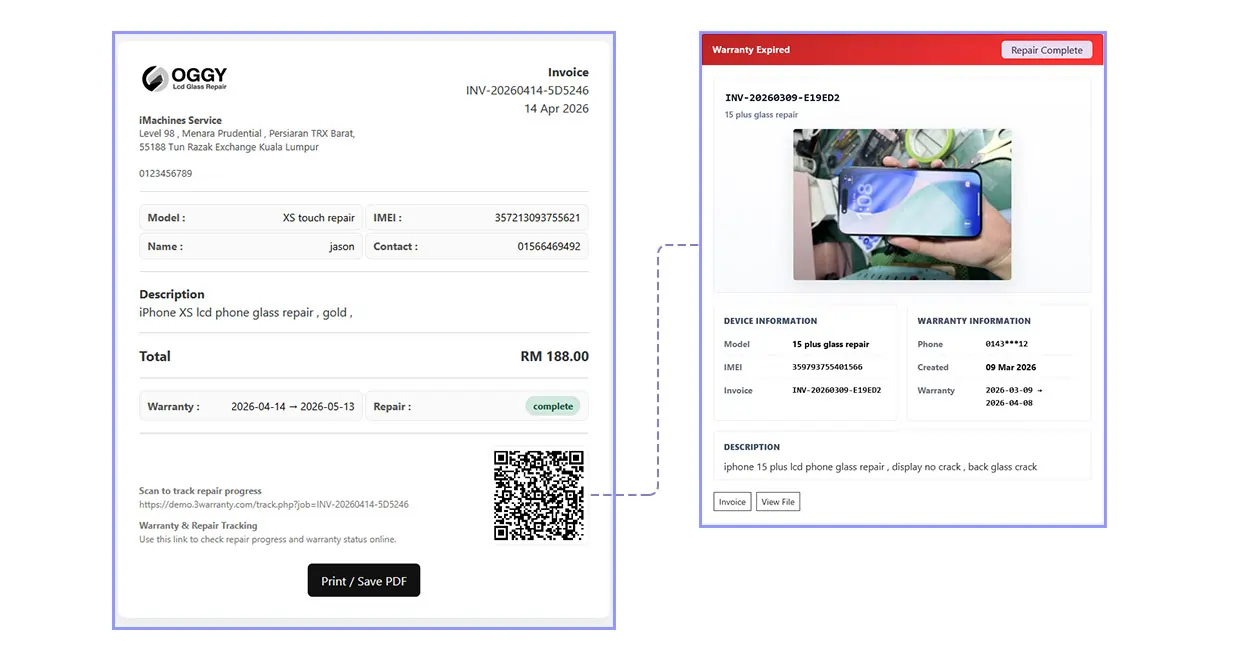
- View — shows the full repair summary and related details
- WhatsApp — prepares a customer message with warranty and repair tracking information
- Invoice — opens the printable invoice page
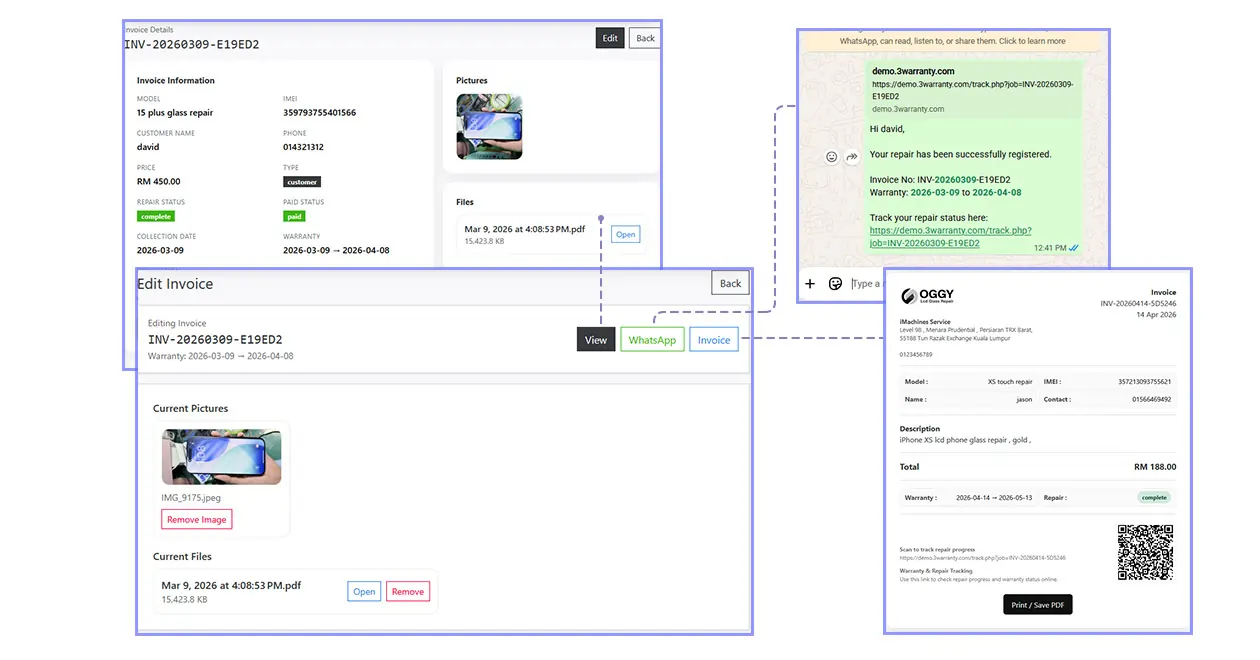
The WhatsApp button is especially useful during busy periods, because customers can walk around while waiting and check repair progress themselves. Once the repair status changes to Complete, they can return without needing to call and ask again.
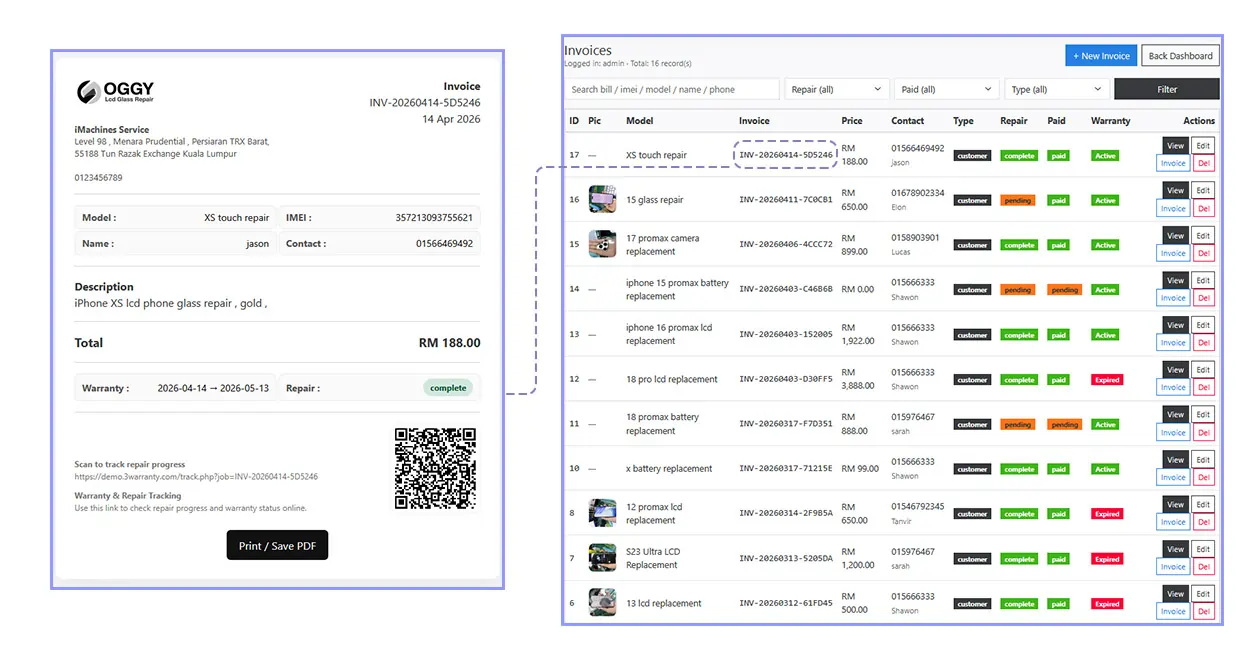
The invoice page also includes a QR code that links to the repair status and warranty lookup page.
07. Invoice Database Lookup
Go back to the dashboard and open the Invoices page.
This page contains all repair jobs stored in your database. You can review repair history, customer collection records, warranty status, and payment status.
You can search using phone number, customer name, invoice number, or IMEI.
This makes it much easier to look up old repair records without messy paperwork. All records are organized under one page for faster access.