System Setup Guide
Welcome to the 3Warranty documentation. This guide will help you start using your warranty management system, create your administrator account, and complete the first setup for your shop.
01. Introduction
3Warranty is built to simplify warranty and repair management for mobile repair businesses. You can use it to manage repair invoices, set warranty periods, customize your public warranty lookup page, and keep all customer records in one organized system.
Before you start using the system, make sure your shop profile, invoice letterhead, and warranty lookup page are properly configured.
02. Quick Start
Once your registration is completed, we will send you an email when your system is ready.
Follow the instructions in the email to begin setting up your warranty management system.
Please check your inbox first. If you cannot find the email, check your spam or junk folder as well.
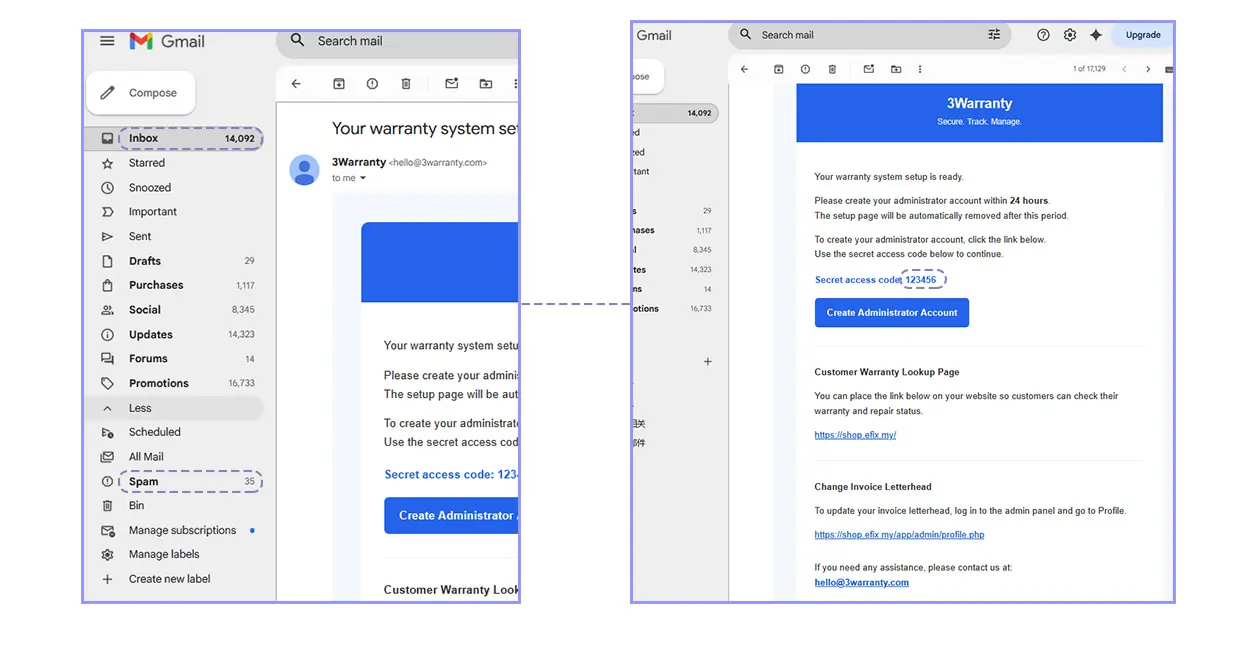
03. Email Setup
Open the setup email and copy the secret access code. This code is usually a 6-digit number.
Click the administrator account creation link provided in the email, then enter the 6-digit code to access the admin creation page.
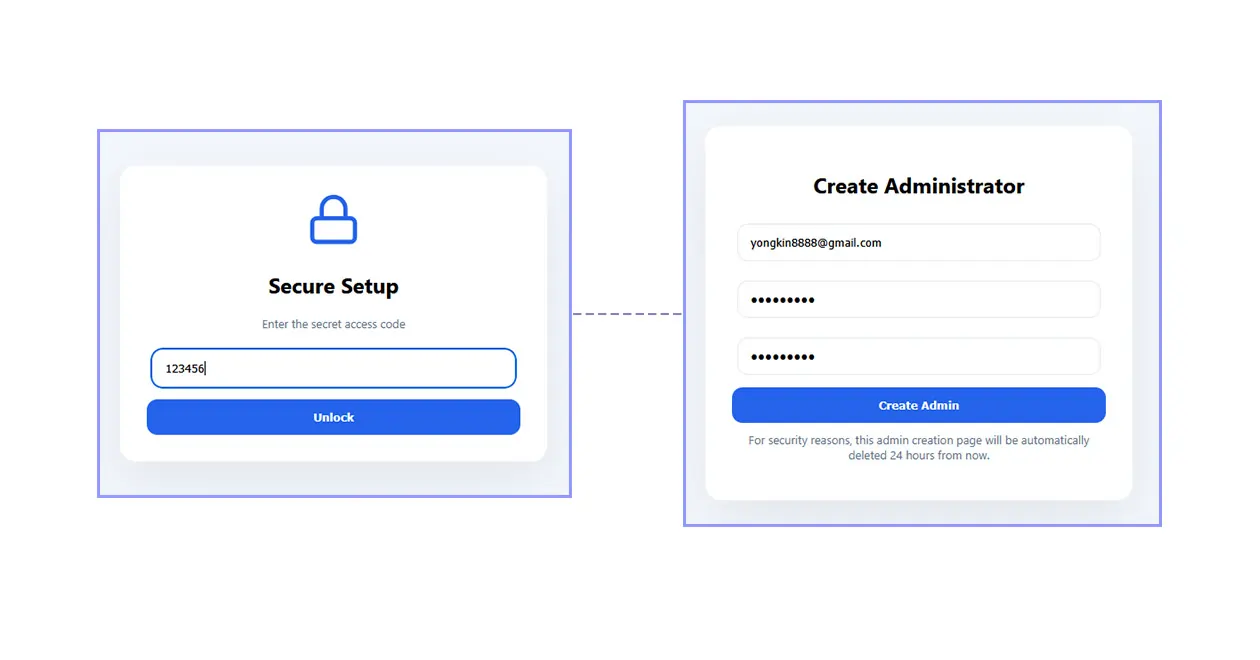
Next, enter your login email address and password, then click Create Admin. Once completed, your administrator account will be ready to use.
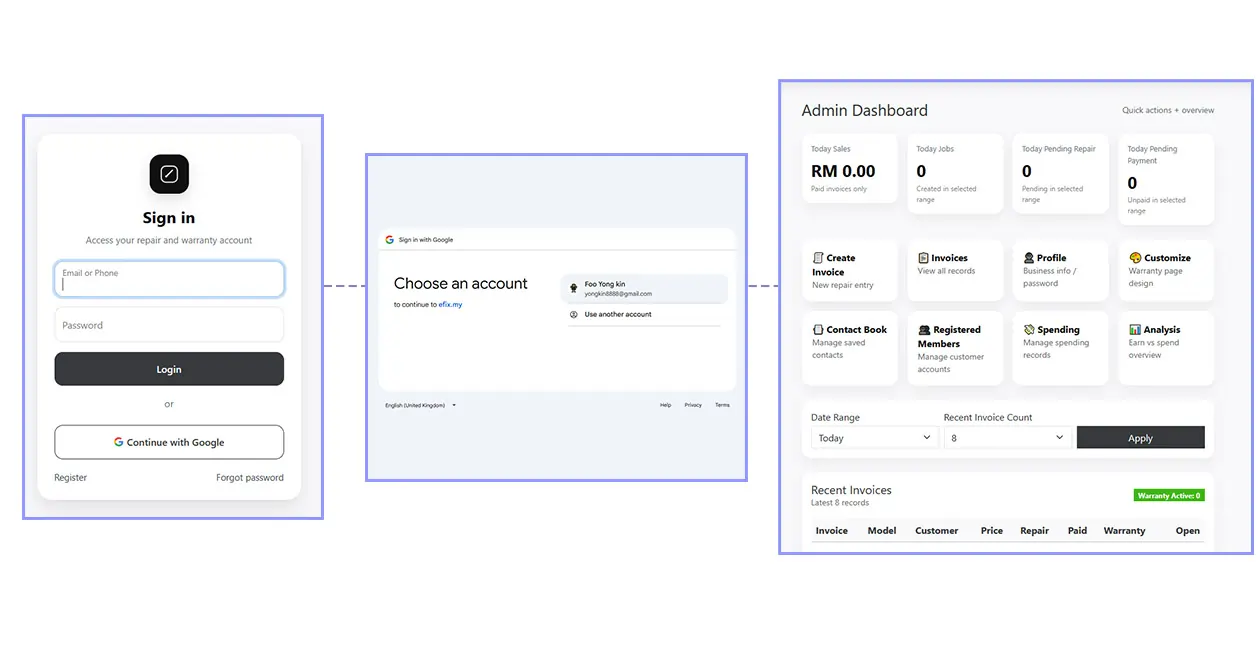
04. Admin Login
Go to your main website address, for example: shopname.efix.my
Click the Login button on the main page to enter the administrator panel.
At this point, your admin account creation and login setup are complete.